ASSEMBLING THE BODY -- 2
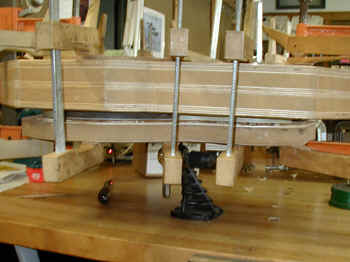
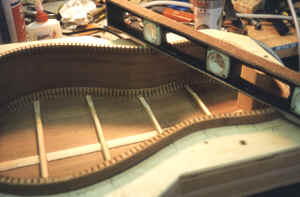 After the back is glued on I locate and install the top. Step
one, shown here, is to flatten the ribs to match the top. As you
can see, I use a high tech tool -- a level with sandpaper glued on the
edges. This photo is slightly deceptive -- normally I have the spreaders
in place when I do this to provide support to the ribs. Otherwise
they tend to vibrate when I do this step.
After the back is glued on I locate and install the top. Step
one, shown here, is to flatten the ribs to match the top. As you
can see, I use a high tech tool -- a level with sandpaper glued on the
edges. This photo is slightly deceptive -- normally I have the spreaders
in place when I do this to provide support to the ribs. Otherwise
they tend to vibrate when I do this step.
 The next step is slightly tricky. If the top is perfectly flat
there is a problem with the neck angle. A guitar neck must
be set back (angled) slightly from the flat plane of the top -- if it
is not, the bridge will be too low for good tone. But
if the neck is set at a slight back angle, the fingerboard will bend slightly
down at the body when it is glued to the top. This is unsightly
and causes the action to be (slightly) too high over the body.
There are three solutions that I can think of. One is to place a
slight wedge under the fingerboard over the body so that it is straight.
(Few if any makers use this technique) Another is to make
the top with a slight dome shape -- the makers that do this typically
use a dome with a radius of about 25 feet. This will give the top
a slight angle where the neck joins and will allow the fingerboard to
lie straight. This method is quite common. The third
method, which I use, (and which I learned from Jim Olson) is to cut a
slight wedge out of the ribs (from the sound hole to the dovetail) so
that the top angles down slightly at the top end of the guitar.
This angle begins at about the top of the sound hole and extends to the
top (dovetail end) of the guitar. If this "wedge" cutout
exactly matches the back angle of the neck, the fingerboard will lie straight.
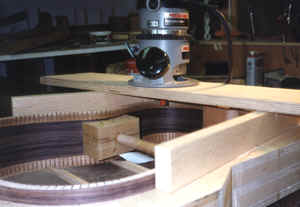
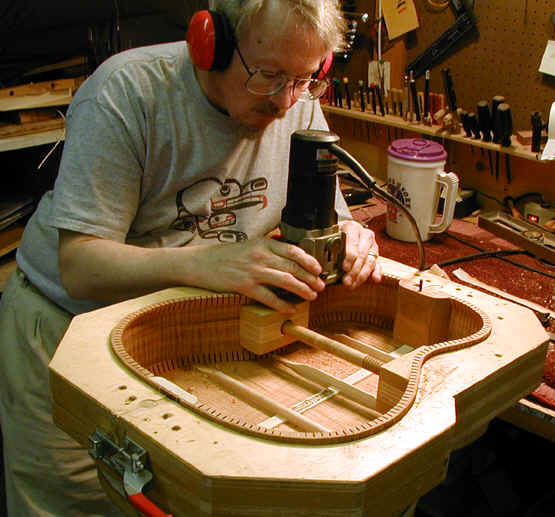
In practice this is relatively easy to do, The two boards you see
mounted on the mold have this taper built in. (I cut them on my
table saw with a taper cutting jig). The router, with a long supporting
base, rides on these angled boards and is then set to the correct depth
of cut. This will then cut a small amount off of the rib and creates
the taper that I am looking for.
The next step is slightly tricky. If the top is perfectly flat
there is a problem with the neck angle. A guitar neck must
be set back (angled) slightly from the flat plane of the top -- if it
is not, the bridge will be too low for good tone. But
if the neck is set at a slight back angle, the fingerboard will bend slightly
down at the body when it is glued to the top. This is unsightly
and causes the action to be (slightly) too high over the body.
There are three solutions that I can think of. One is to place a
slight wedge under the fingerboard over the body so that it is straight.
(Few if any makers use this technique) Another is to make
the top with a slight dome shape -- the makers that do this typically
use a dome with a radius of about 25 feet. This will give the top
a slight angle where the neck joins and will allow the fingerboard to
lie straight. This method is quite common. The third
method, which I use, (and which I learned from Jim Olson) is to cut a
slight wedge out of the ribs (from the sound hole to the dovetail) so
that the top angles down slightly at the top end of the guitar.
This angle begins at about the top of the sound hole and extends to the
top (dovetail end) of the guitar. If this "wedge" cutout
exactly matches the back angle of the neck, the fingerboard will lie straight.
In practice this is relatively easy to do, The two boards you see
mounted on the mold have this taper built in. (I cut them on my
table saw with a taper cutting jig). The router, with a long supporting
base, rides on these angled boards and is then set to the correct depth
of cut. This will then cut a small amount off of the rib and creates
the taper that I am looking for.
 Another photo of the ramp used to guide the router.
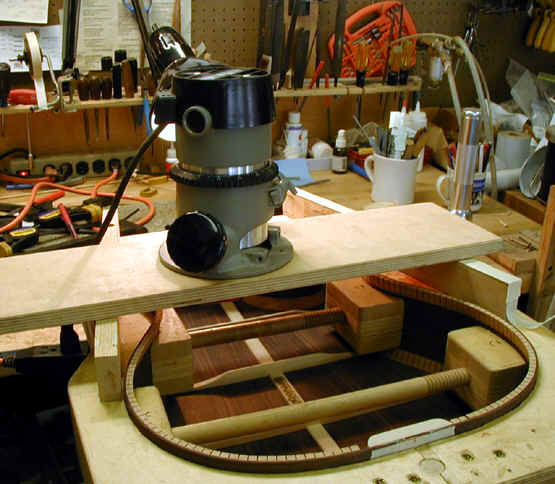
 Here is the router on its long sled preparing to skim the
sides and linings.
Here is the router on its long sled preparing to skim the
sides and linings.
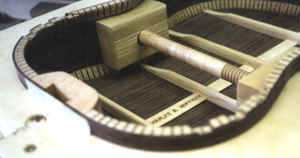
 Another view.
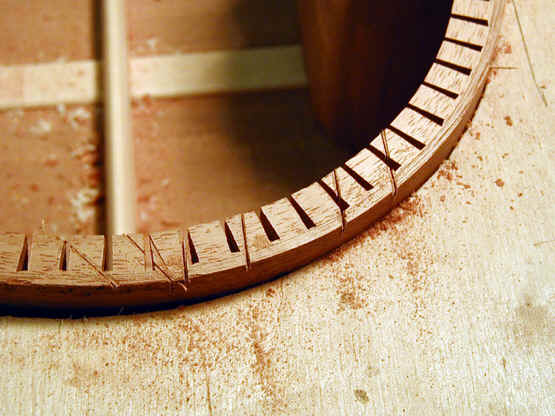
 After the ribs are tapered, I cut the notches for the braces.
I notch in all four ends of the X brace and the two braces under the fingerboard
extension. All others are cut slightly short of the linings and
the linings are not notched. I use a locating pin at the dovetail
end of the guitar (where it will be hidden under the fingerboard) and
simply carefully center the "back" end of the top. Then I
use a small thin saw to outline the braces I will notch in. After I
have marked them, I cut the sides of the notches with a fine fret saw
(this helps keep the router from cutting too wide - the wood will chip out
on the saw mark), and then cut the notches with a laminate trimmer (using
a 1/4" spiral cut bit. These steps are shown in the next four
photos.
After the ribs are tapered, I cut the notches for the braces.
I notch in all four ends of the X brace and the two braces under the fingerboard
extension. All others are cut slightly short of the linings and
the linings are not notched. I use a locating pin at the dovetail
end of the guitar (where it will be hidden under the fingerboard) and
simply carefully center the "back" end of the top. Then I
use a small thin saw to outline the braces I will notch in. After I
have marked them, I cut the sides of the notches with a fine fret saw
(this helps keep the router from cutting too wide - the wood will chip out
on the saw mark), and then cut the notches with a laminate trimmer (using
a 1/4" spiral cut bit. These steps are shown in the next four
photos.
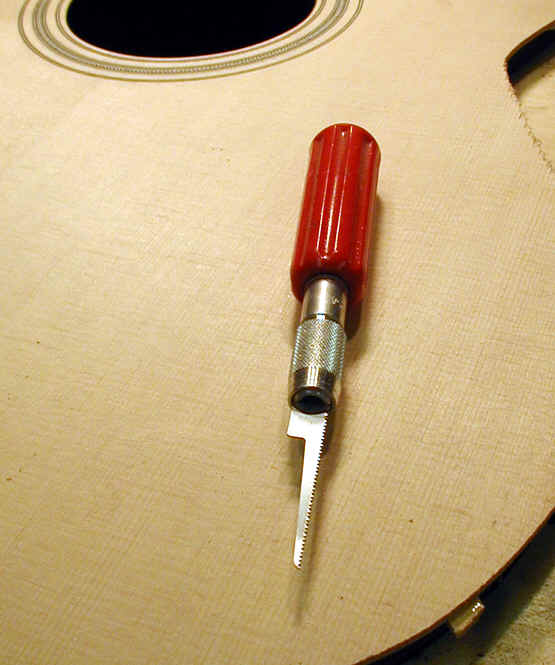 The
saw used to mark the outline of the braces.
The
saw used to mark the outline of the braces.
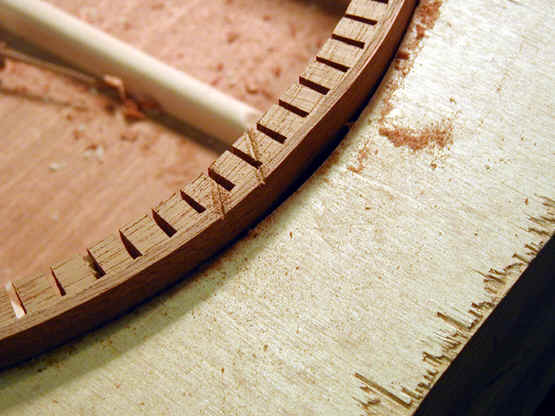 Marks
on the linings, almost ready to notch.
Marks
on the linings, almost ready to notch.
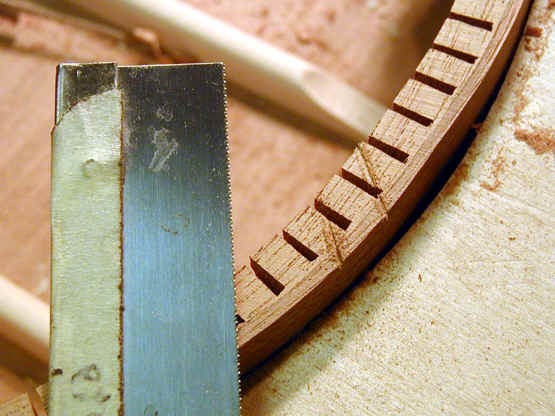 I
use this saw to deepen the outline cuts.
I
use this saw to deepen the outline cuts.
 If
I cut the sides of the notch with a thin saw, the routing of the notches
is easier. As the router bit approaches the saw cut, the wood will
tend to chip out right to, but not beyond, the line. This makes for
a very precise notch.
If
I cut the sides of the notch with a thin saw, the routing of the notches
is easier. As the router bit approaches the saw cut, the wood will
tend to chip out right to, but not beyond, the line. This makes for
a very precise notch.
 Cutting
the notches with a laminate trimmer (small router).
Cutting
the notches with a laminate trimmer (small router).
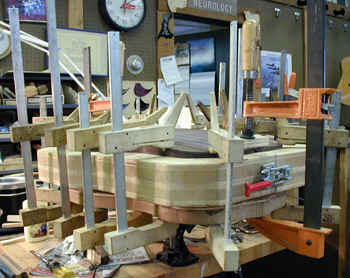
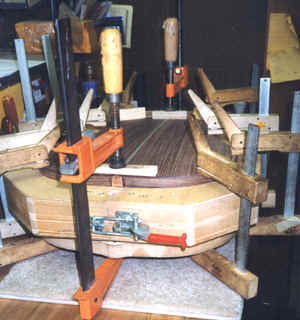
 Here the top is being glued onto the walnut body. What doesn't
show is that the work board under all this -- on which the
top is resting, has a wedge or ramp to match the wedge cut out of the
ribs. (I cut the wood to make this ramp at the same time and with
the same jig as I cut the boards which guide the router.) This ensures
that the assembled body really will have the slight taper on the top.
Here the top is being glued onto the walnut body. What doesn't
show is that the work board under all this -- on which the
top is resting, has a wedge or ramp to match the wedge cut out of the
ribs. (I cut the wood to make this ramp at the same time and with
the same jig as I cut the boards which guide the router.) This ensures
that the assembled body really will have the slight taper on the top.
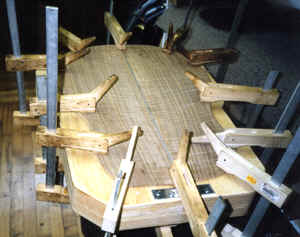
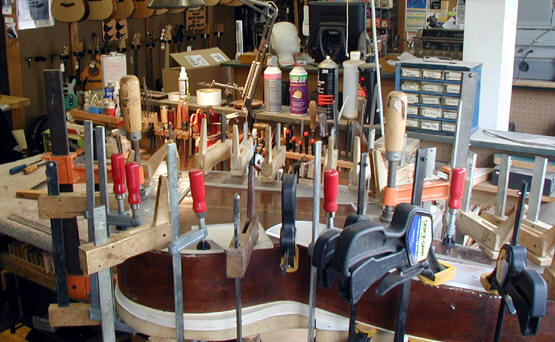
 Another photo of the same. Notice that the work board
is elevated above the workbench. This makes it easier to apply the
clamps, and the device I use (a carvers clamp) enables the work board to
rotate as well. This is really quite efficient. I can also
mount the work board for the back on this device.
Another photo of the same. Notice that the work board
is elevated above the workbench. This makes it easier to apply the
clamps, and the device I use (a carvers clamp) enables the work board to
rotate as well. This is really quite efficient. I can also
mount the work board for the back on this device.
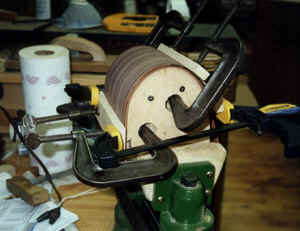
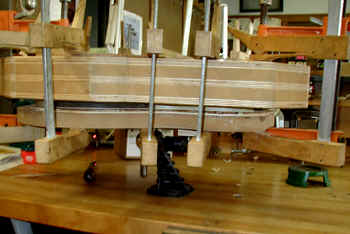 Another photo of the
elevated work board.
Another photo of the
elevated work board.
 Another photo of
the same
Another photo of
the same
 Another view of the glue up, this time with a rosewood guitar.
 This shows a repair - gluing a back onto an old Dyer Brothers harp guitar.
It took two people working carefully and fast - and 32 clamps. Proof
of the old adage - you can never be too rich, too thin or have too many
clamps.
This shows a repair - gluing a back onto an old Dyer Brothers harp guitar.
It took two people working carefully and fast - and 32 clamps. Proof
of the old adage - you can never be too rich, too thin or have too many
clamps.
 Here is the walnut guitar before the top and back have been trimmed.
 Here is the walnut guitar after its "haircut".
 This is a view of the cutaway being bent. I use a silicone
rubber blanket which is heated to provide the heat -- the photo is fairly
self explanatory as to the rest.
This is a view of the cutaway being bent. I use a silicone
rubber blanket which is heated to provide the heat -- the photo is fairly
self explanatory as to the rest.
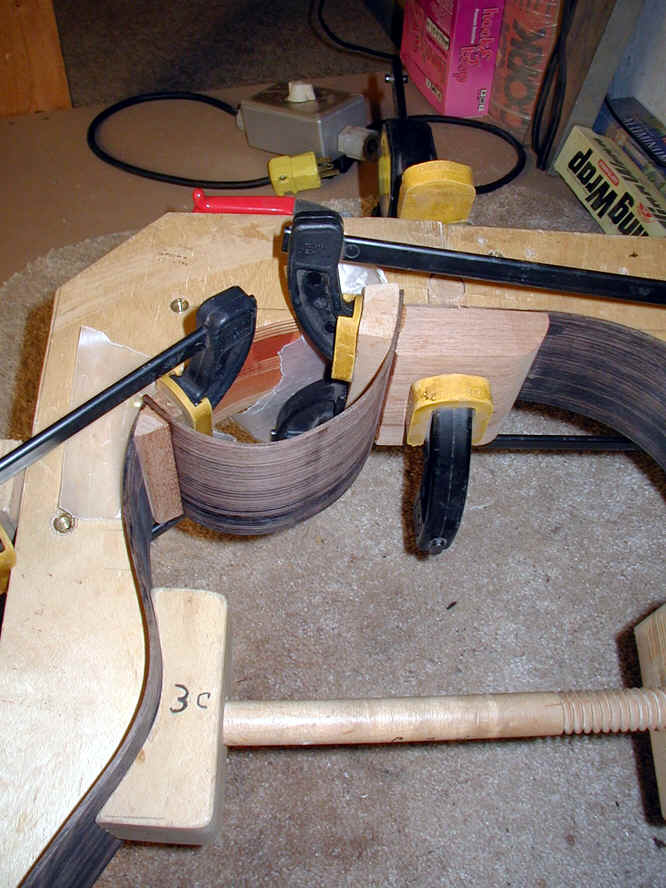 Here the cutaway is being glued to the neck block. The tricky
part of this is shaping the end block so that it exactly matched the slight
curvature of the cutaway. Currently I do this with an oscillating drum
sander. For a long time I resisted getting this tool thinking it
would be expensive and of limited use. WRONG!! It is now one of the
most used tools in the shop and I kick myself for not getting it earlier.
Here the cutaway is being glued to the neck block. The tricky
part of this is shaping the end block so that it exactly matched the slight
curvature of the cutaway. Currently I do this with an oscillating drum
sander. For a long time I resisted getting this tool thinking it
would be expensive and of limited use. WRONG!! It is now one of the
most used tools in the shop and I kick myself for not getting it earlier.
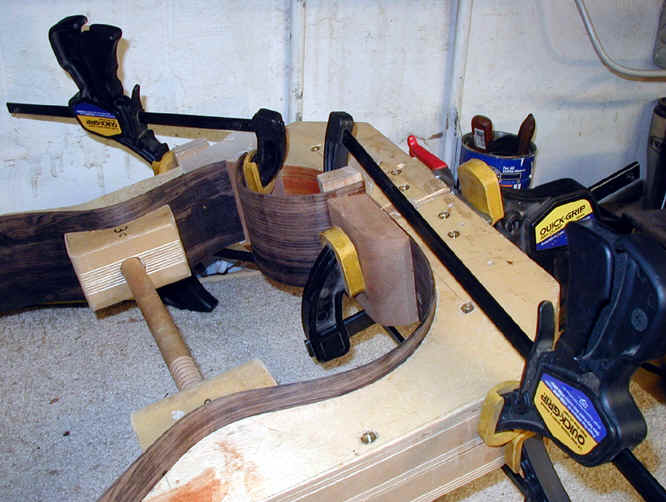 Another angle on this.
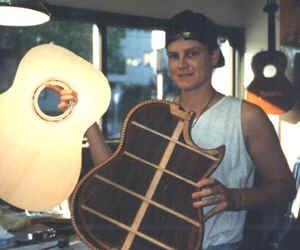 Here is Michelle holding a cutaway she is building. Note that
the lining for the cutaway is solid -- something I have always done.
I feel (rightly or wrongly -- I don't know) that this is an area where
the extra rigidity is helpful to the structural integrity of the instrument.
There is another photo of this HERE.
Here is Michelle holding a cutaway she is building. Note that
the lining for the cutaway is solid -- something I have always done.
I feel (rightly or wrongly -- I don't know) that this is an area where
the extra rigidity is helpful to the structural integrity of the instrument.
There is another photo of this HERE.
This website and all of its content, text and images are copyright ©1997-2012 by Charles A. Hoffman. All rights reserved.