MAKING THE BACK
 I
have a variety of Plexiglas templates which I use for laying out the back
(and others for tops). The Plexiglas makes it possible to lay out
the back on the wood for best effect. I use a 1/8" Plexiglas
for this.
I
have a variety of Plexiglas templates which I use for laying out the back
(and others for tops). The Plexiglas makes it possible to lay out
the back on the wood for best effect. I use a 1/8" Plexiglas
for this.
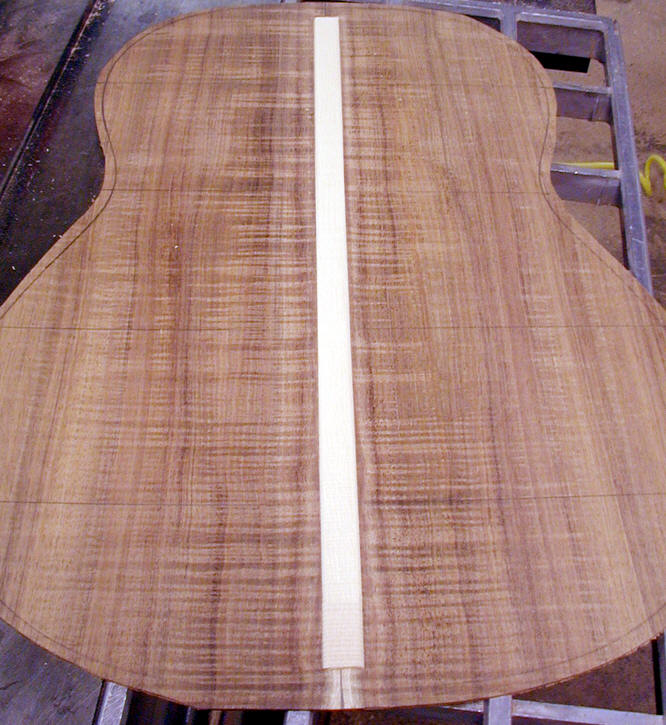
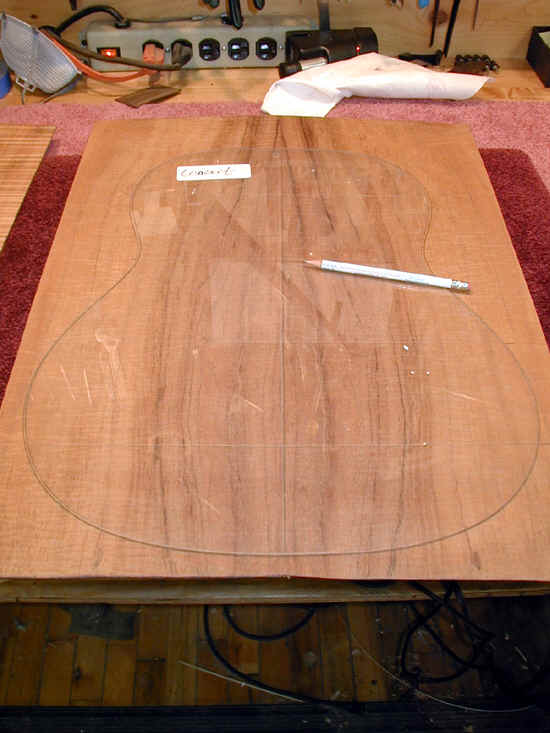 Here I am laying out a piece of koa.
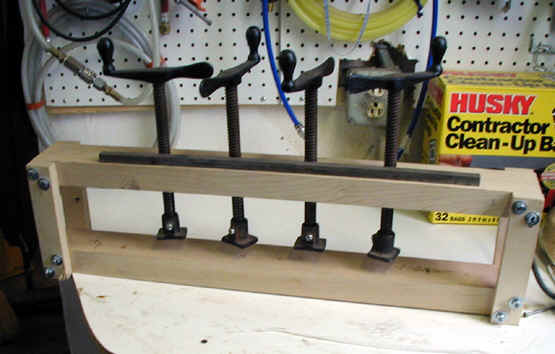 After the back is sanded to thickness,
the shape laid out, and fine sanded
by hand, I glue the center seam strip in place. Many years ago I
made this clamp from some veneer press screws (available from many woodworking
catalogs) and some scrap maple. I also use it to glue in the center
decorative strip in the back.
After the back is sanded to thickness,
the shape laid out, and fine sanded
by hand, I glue the center seam strip in place. Many years ago I
made this clamp from some veneer press screws (available from many woodworking
catalogs) and some scrap maple. I also use it to glue in the center
decorative strip in the back.
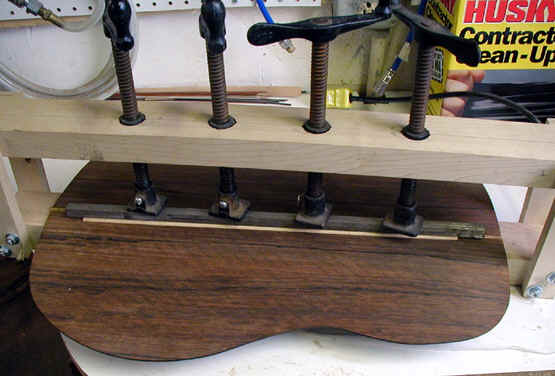 Here the jig is gluing in the back center reinforcing strip.
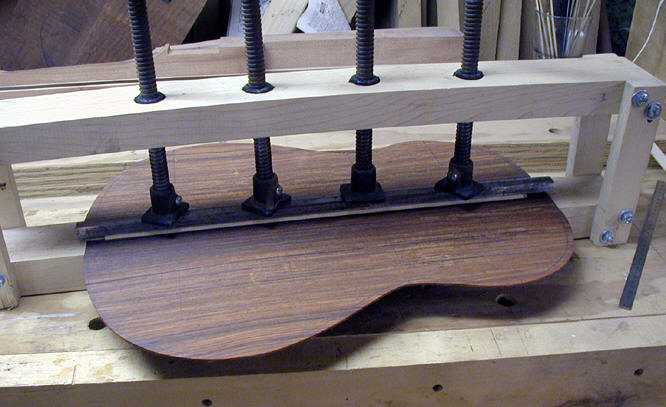
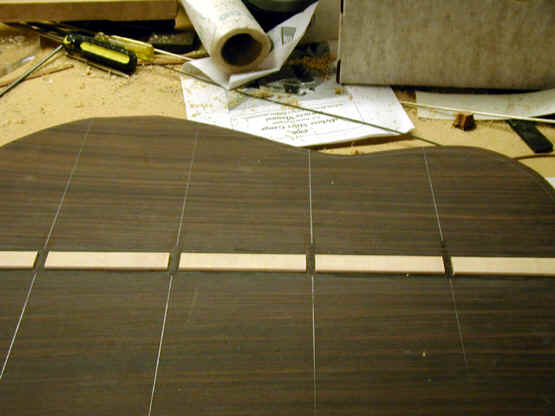
 This is the rough center strip in place after gluing.
 I then roughly shape the center strip with a skew chisel
and then sand it to a smooth curved shape.
I then roughly shape the center strip with a skew chisel
and then sand it to a smooth curved shape.
Recently I have modified my technique here. I now preshape the edges of the center strip on my spindle shaper- I use a small roundover router bit, which cuts a smooth and consistent profile on the center strip. It also leaves a larger portion of the strip flat which is useful since I have a new branding iron with my logo on it, which works best on a flat surface. Even with this preshaped center reinforcing strip I carefully sand it before cutting grooves for the back braces.
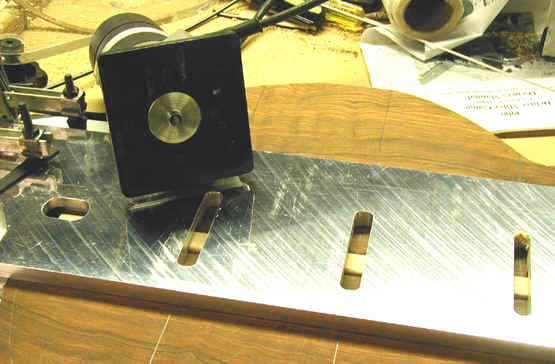 The next step is to cut the grooves in the center
strip for the back braces. I use a jig made of machined
aluminum.. It sits over the center strip and has carefully sized openings
which guide the router -- which itself uses a template guide to
follow the openings. The cutter is set to just skim over the back,
and thus remove the center strip.
The next step is to cut the grooves in the center
strip for the back braces. I use a jig made of machined
aluminum.. It sits over the center strip and has carefully sized openings
which guide the router -- which itself uses a template guide to
follow the openings. The cutter is set to just skim over the back,
and thus remove the center strip.
 Another view of this jig.
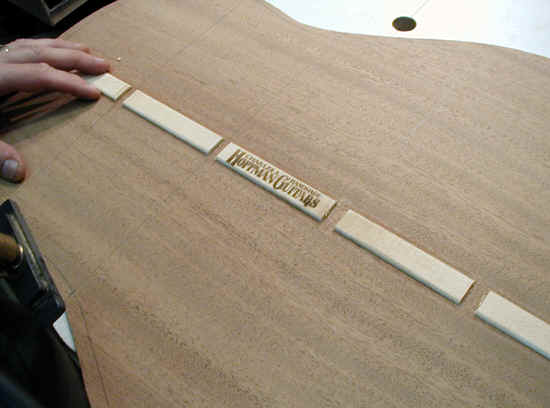 After cutting the grooves for the braces, I put my name on with a
wood burning tool, and am ready to glue in the braces.
After cutting the grooves for the braces, I put my name on with a
wood burning tool, and am ready to glue in the braces.
 Here I am burning the logo into the center strip.
 This
is the jig for gluing back braces - note the curved bottom piece, which
matches the curvature of the brace.
This
is the jig for gluing back braces - note the curved bottom piece, which
matches the curvature of the brace.
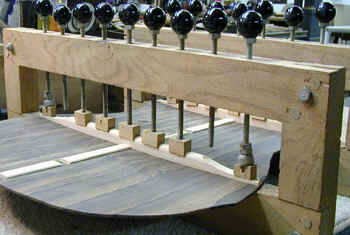
 I have slightly rebuilt the brace gluing jig. The clamping portion
now has swivel feet on it and they are threaded into an accurately
machined bar so that they are all in a straight line. Works better
than before, but not essentially different.
I have slightly rebuilt the brace gluing jig. The clamping portion
now has swivel feet on it and they are threaded into an accurately
machined bar so that they are all in a straight line. Works better
than before, but not essentially different.
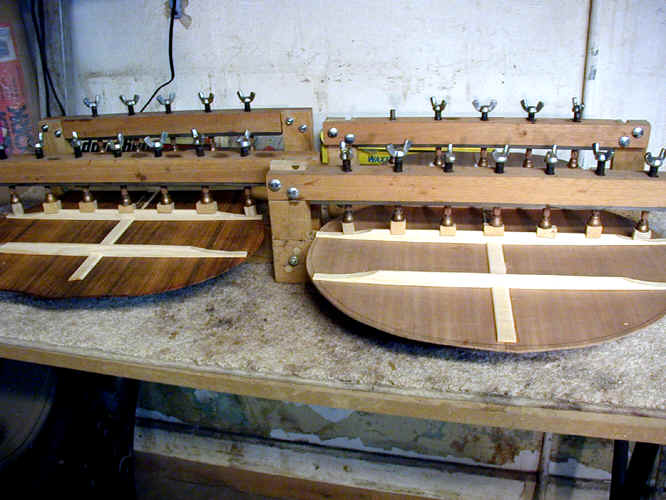
 Gluing the braces
on the back. The clamps -- homemade-- have their
bottom piece curved to match the curvature of the back braces. These
devices are made of maple and the clamps are simply threaded rod
and threaded inserts which are set into the top piece of the device.
The two white pieces are made of plastic and have grooves cut to the exact
spacing and size of the braces. These two "locators" in
conjunction with the slot in the center seam strip insure that the braces
are properly located and parallel. This is important since I have
a template for cutting the linings to accept the ends of the braces and
this only works if the braces are exactly located. This is all quite
simple in execution and works well.
Gluing the braces
on the back. The clamps -- homemade-- have their
bottom piece curved to match the curvature of the back braces. These
devices are made of maple and the clamps are simply threaded rod
and threaded inserts which are set into the top piece of the device.
The two white pieces are made of plastic and have grooves cut to the exact
spacing and size of the braces. These two "locators" in
conjunction with the slot in the center seam strip insure that the braces
are properly located and parallel. This is important since I have
a template for cutting the linings to accept the ends of the braces and
this only works if the braces are exactly located. This is all quite
simple in execution and works well.
 A different view of the same.
 And again.
 The back with all the braces glued in place.
This website and all of its content, text and images are copyright ©1997-2011 by Charles A. Hoffman. All rights reserved.