BRIDGE GLUING
Gluing on the bridge is one of the most common jobs for a guitar maker/repairperson. Obviously it must be done for every new guitar, and frequently is done as a repair on existing guitars. The techniques are essentially the same in any case. Here is how I do it.
 The
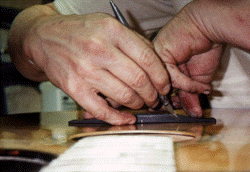
first step is to carefully locate the bridge on the top. It must
be centered (you can just see my center mark in the photo. I bought
a centering ruler just for this, and love it). It must be the correct
distance so the saddle will be correctly located. For me this is
relatively easy since I cut the saddle slot after the bridge is glued,
but either way it is a simple matter of measuring correctly. I strongly
recommend buying a very good ruler -- preferably about 24".
I use a Starrett and their quality is a comfort to me. It is
also important in locating the bridge to ensure that the straight front
edge of the bridge (at least in my design) is perpendicular to the center
line of the top. If it is not perpendicular, the guitar will look
lopsided. After I have measured this several times, I lightly tape
the bride in place and hang it on the wall. Then I step back 10
paces or so and see how it looks. This turns out to be a very
accurate procedure. After the location is certain (remember the old
saying "measure twice, cut once."), I scribe around the bridge
with a fine exacto blade, being very careful to make my line very exact.
I cut through the lacquer, but not the top. If the knife blade is
gently heated in a blowtorch, it will cut with less likelihood of chipping the
lacquer.
The
first step is to carefully locate the bridge on the top. It must
be centered (you can just see my center mark in the photo. I bought
a centering ruler just for this, and love it). It must be the correct
distance so the saddle will be correctly located. For me this is
relatively easy since I cut the saddle slot after the bridge is glued,
but either way it is a simple matter of measuring correctly. I strongly
recommend buying a very good ruler -- preferably about 24".
I use a Starrett and their quality is a comfort to me. It is
also important in locating the bridge to ensure that the straight front
edge of the bridge (at least in my design) is perpendicular to the center
line of the top. If it is not perpendicular, the guitar will look
lopsided. After I have measured this several times, I lightly tape
the bride in place and hang it on the wall. Then I step back 10
paces or so and see how it looks. This turns out to be a very
accurate procedure. After the location is certain (remember the old
saying "measure twice, cut once."), I scribe around the bridge
with a fine exacto blade, being very careful to make my line very exact.
I cut through the lacquer, but not the top. If the knife blade is
gently heated in a blowtorch, it will cut with less likelihood of chipping the
lacquer.
 More
of the same.
More
of the same.
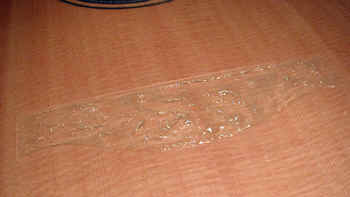
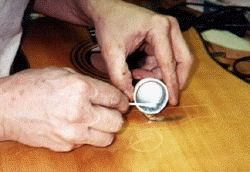 The
next step is to remove the lacquer. I use a semi-paste stripper
to remove most of it. Of course there are other ways. Some
makers apply masking tape (or even a thin plastic "mask")
to the top where the bridge will go before finishing the body, which then
can be easily removed. The lacquer can also be removed with a router
set to cut only that thickness. Like most of what we do, there are
many ways to skin the cat. I continue to use this method
largely because of habit and familiarity.
The
next step is to remove the lacquer. I use a semi-paste stripper
to remove most of it. Of course there are other ways. Some
makers apply masking tape (or even a thin plastic "mask")
to the top where the bridge will go before finishing the body, which then
can be easily removed. The lacquer can also be removed with a router
set to cut only that thickness. Like most of what we do, there are
many ways to skin the cat. I continue to use this method
largely because of habit and familiarity.
 The
stripper at work.
The
stripper at work.
 And again.
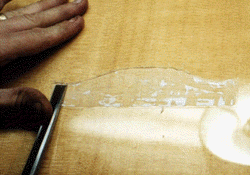 After
most of the lacquer is removed, I very carefully finish the job with a
very sharp chisel, making certain that all lacquer inside the scribed
line is gone. Then I carefully sand the wood to remove any traces
of lacquer or stripper. I made a small sanding block out of Plexiglas
to ensure that the wood stays absolutely flat.
After
most of the lacquer is removed, I very carefully finish the job with a
very sharp chisel, making certain that all lacquer inside the scribed
line is gone. Then I carefully sand the wood to remove any traces
of lacquer or stripper. I made a small sanding block out of Plexiglas
to ensure that the wood stays absolutely flat.
 More
of the same.
More
of the same.
 After the
finish is removed I carefully sand the wood (with a 100 grit paper) to
ensure that it is flat, smooth and that no traces of the stripper
remain. I made this small Plexiglas sanding block just for this
purpose.
After the
finish is removed I carefully sand the wood (with a 100 grit paper) to
ensure that it is flat, smooth and that no traces of the stripper
remain. I made this small Plexiglas sanding block just for this
purpose.
 Another
view.
Another
view.
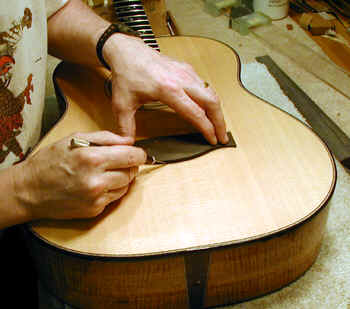
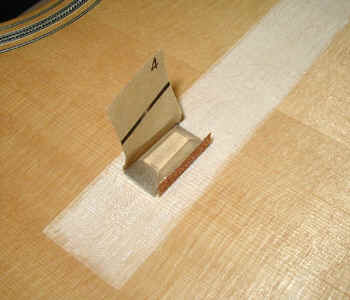
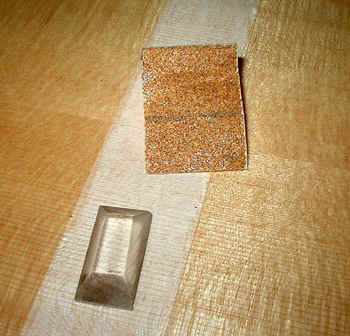
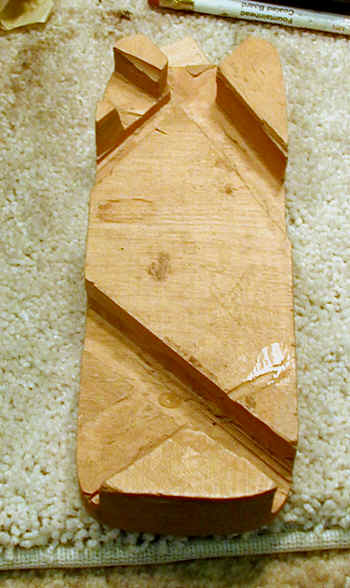 This
caul fits inside the guitar to provide a good surface for the clamps to
rest without damaging the top or braces. As you can see, it is cut
out to span the braces. I have one for each of the various designs
that I use.
This
caul fits inside the guitar to provide a good surface for the clamps to
rest without damaging the top or braces. As you can see, it is cut
out to span the braces. I have one for each of the various designs
that I use.
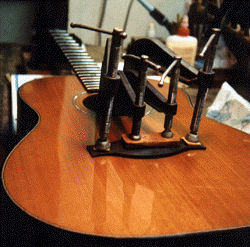 Finally,
I glue on the bridge. You can see that I use plenty of clamps. There
is a caul inside which bridges over any braces (see above), and the caul on the center
of the top of the bridge is carefully shaped to fit my bridge. The
pads on the ears of the bridge are spruce so as not to mar the bridge.
Apply glue, clamp and then carefully wipe off any squeeze out. While
I use plenty of clamps, and want a good tight joint, one must be careful
not to apply so much pressure as to caused a "starved" glue
joint.
Finally,
I glue on the bridge. You can see that I use plenty of clamps. There
is a caul inside which bridges over any braces (see above), and the caul on the center
of the top of the bridge is carefully shaped to fit my bridge. The
pads on the ears of the bridge are spruce so as not to mar the bridge.
Apply glue, clamp and then carefully wipe off any squeeze out. While
I use plenty of clamps, and want a good tight joint, one must be careful
not to apply so much pressure as to caused a "starved" glue
joint.
 More
of the same. these days I am using hot hide glue to glue on bridges
because I believe that it is a stronger glue and less susceptible to
heat. this means one has to work very fast. I use a couple of
tapered pins to quickly locate the bridge and a vacuum clamp to make the
initial contact. After about 5 minutes of vacuum clamping I can
remove that clamp and put the C clamps on. saves wear and tear on
the vac clamp.
More
of the same. these days I am using hot hide glue to glue on bridges
because I believe that it is a stronger glue and less susceptible to
heat. this means one has to work very fast. I use a couple of
tapered pins to quickly locate the bridge and a vacuum clamp to make the
initial contact. After about 5 minutes of vacuum clamping I can
remove that clamp and put the C clamps on. saves wear and tear on
the vac clamp.
This website and all of its content, text and images are copyright ©1997-2012 by Charles A. Hoffman. All rights reserved.
| NEXT | Making Pyramid Bridge |