Making the Fingerboard
 The first step in making the fingerboard, which is not shown here,
is to flatten the bottom. I do this easily and quickly on my jointer,
and couldn't think of an interesting photo for this step. The next
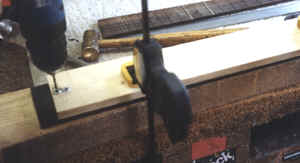
step, shown here, is to drill two index holes on the centerline of the
board. These are outside the area of the fingerboard itself, so
they won't need to be filled later. They help to hold the board
accurately in the jigs which follow. To drill these index holes
I made a jig of Baltic birch plywood (which is quite dimensionally stable)
and mounted two (actually three - for reasons I won't go into here) drill
bushings, which guide the drill and won't wear with use.
The first step in making the fingerboard, which is not shown here,
is to flatten the bottom. I do this easily and quickly on my jointer,
and couldn't think of an interesting photo for this step. The next
step, shown here, is to drill two index holes on the centerline of the
board. These are outside the area of the fingerboard itself, so
they won't need to be filled later. They help to hold the board
accurately in the jigs which follow. To drill these index holes
I made a jig of Baltic birch plywood (which is quite dimensionally stable)
and mounted two (actually three - for reasons I won't go into here) drill
bushings, which guide the drill and won't wear with use.
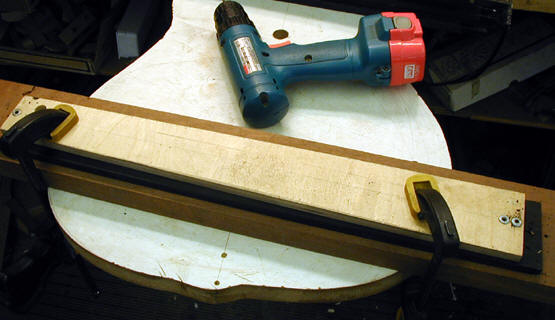 Another photo of the same.
 The next step, shown here, is to taper the board. I have a
jig, made of Baltic birch, with wear surfaces covered with high density
plastic, which is the exact shape of the board. There are small
metal pins on the jig which accurately hold the board and ensure that
the taper is centered and symmetrical. I do the cut with my spindle
shaper and a straight cutter and a matching ball bearing rub collar. Actually
very low tech (this could be equally well done on a router table) and
works well.
The next step, shown here, is to taper the board. I have a
jig, made of Baltic birch, with wear surfaces covered with high density
plastic, which is the exact shape of the board. There are small
metal pins on the jig which accurately hold the board and ensure that
the taper is centered and symmetrical. I do the cut with my spindle
shaper and a straight cutter and a matching ball bearing rub collar. Actually
very low tech (this could be equally well done on a router table) and
works well.
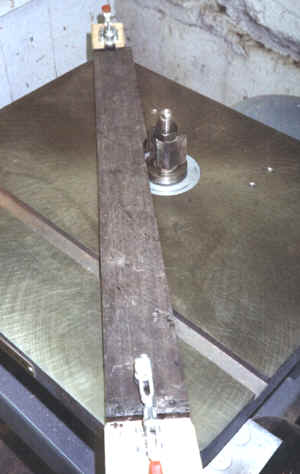
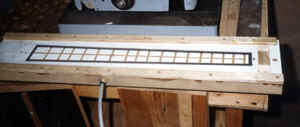 The next step is to shape the top of the board to the correct radius
( I use a 14" radius). This jig uses pins to locate and (partly
hold) the board. The board is really held with a vacuum pump - hence
the small tube coming out the side and the pattern of slots and foam tape
which you can see.
The next step is to shape the top of the board to the correct radius
( I use a 14" radius). This jig uses pins to locate and (partly
hold) the board. The board is really held with a vacuum pump - hence
the small tube coming out the side and the pattern of slots and foam tape
which you can see.
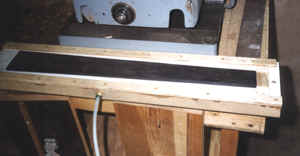 Here is the same jig with the board in place.
 The tool I use to cut the radius is
a Williams and Hussey planer/molder. I use this tool for light thickness
planning (particularly the blocks that make up the neck blanks) and for
this job. Although this tool is relatively small (it will only plane
up to 7" wide in one pass) and relatively expensive (I don't
remember - I bought it a long time ago), it is very well built and works
very well. I have been very happy with it.
The tool I use to cut the radius is
a Williams and Hussey planer/molder. I use this tool for light thickness
planning (particularly the blocks that make up the neck blanks) and for
this job. Although this tool is relatively small (it will only plane
up to 7" wide in one pass) and relatively expensive (I don't
remember - I bought it a long time ago), it is very well built and works
very well. I have been very happy with it.
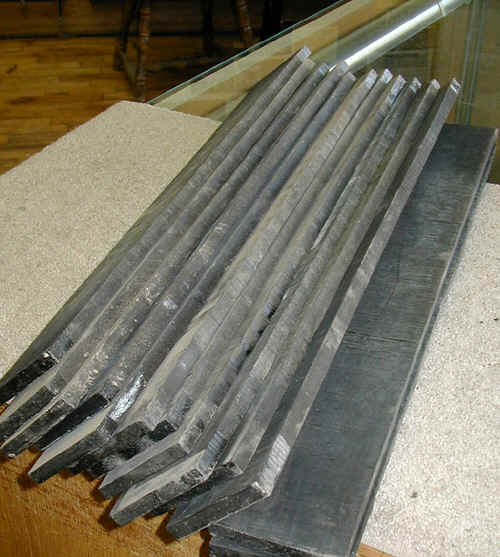
 Here is a photo of the blade used to shape the radius on the board.
I had them (there are two) custom made and the cost was not all that high.
The combination of the vacuum jig and this cutter makes the most accurate
and precise boards I have ever done. I am absolutely thrilled with
the process.
Here is a photo of the blade used to shape the radius on the board.
I had them (there are two) custom made and the cost was not all that high.
The combination of the vacuum jig and this cutter makes the most accurate
and precise boards I have ever done. I am absolutely thrilled with
the process.
This website and all of its content, text and images are copyright ©1997-2011 by Charles A. Hoffman. All rights reserved.