NECK FITTING
This page looks at the process of attaching the neck to the body - and to some degree rehashes some of the material on other pages.
I use a traditional dovetail joint to attach my necks to the body. (Technically it is a tapered dovetail). I use this technique (as opposed to bolt on necks, for example) for a variety of reasons. Partially I am a bit of a traditionalist, and this is the traditional method. I am used to it - I have been doing it for 30 years and am quite familiar with it, and pretty good at it. When I started no one was using bolt on necks and there was no hardware to make it an easy choice.
I do not believe that a dovetail is "better" than other methods - it is just the way I do it. There seems to be a lot of controversy these days over which method is "better" - and I think this is silly. Either method (and there are others as well) is just fine if executed well.
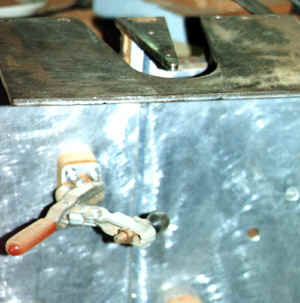
 This
is the jig I use to cut the dovetail in my bodies. I cut the dovetail
after the end blocks are attached to the ribs but before the top or back
is attached. I use a router with a dovetail cutter and a template
follower to follow the edge of the jig. The jig is adjustable for
size, and matches the shape of the jig for the neck dovetail.
This
is the jig I use to cut the dovetail in my bodies. I cut the dovetail
after the end blocks are attached to the ribs but before the top or back
is attached. I use a router with a dovetail cutter and a template
follower to follow the edge of the jig. The jig is adjustable for
size, and matches the shape of the jig for the neck dovetail.
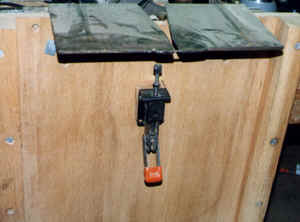
 This
is the jig for cutting the dovetail on neck blanks. Although the
photo doesn't show it well, there is an alignment piece that fits in the
truss rod slot, and the De-Sta-Co clamps hold the neck in place.
The dovetail is cut with the same dovetail cutter/template follower as
is used for the body.
This
is the jig for cutting the dovetail on neck blanks. Although the
photo doesn't show it well, there is an alignment piece that fits in the
truss rod slot, and the De-Sta-Co clamps hold the neck in place.
The dovetail is cut with the same dovetail cutter/template follower as
is used for the body.
 Here
I am fitting the neck dovetail to the body. There are several adjustments
to make (depending on how accurately my jigs (above) worked. The neck
(fingerboard) must be centered on the centerline of the body. In
addition the neck is slightly angled back from the plane of the top so
that the bridge will be the correct height. (More about both of these
later) Most of the adjustments are made to the sides of the
neck (the cheeks) which rest on the sides of the guitar. This is where
the angle of the neck to the body is corrected -- both side to side and
the angle back from the plane of the top. After these adjustments
are made, I correct the dovetail itself so that it fits tightly in the
cavity in the body.
Here
I am fitting the neck dovetail to the body. There are several adjustments
to make (depending on how accurately my jigs (above) worked. The neck
(fingerboard) must be centered on the centerline of the body. In
addition the neck is slightly angled back from the plane of the top so
that the bridge will be the correct height. (More about both of these
later) Most of the adjustments are made to the sides of the
neck (the cheeks) which rest on the sides of the guitar. This is where
the angle of the neck to the body is corrected -- both side to side and
the angle back from the plane of the top. After these adjustments
are made, I correct the dovetail itself so that it fits tightly in the
cavity in the body.
 The
last step in fitting the neck is to carefully perfect the joint between
the body and the neck. To get a perfect fit I place a small sheet
of sandpaper between the body and the neck, hold the neck in tightly and
slowly withdraw the sandpaper. The result, with only a few strokes,
is a perfect fit.
The
last step in fitting the neck is to carefully perfect the joint between
the body and the neck. To get a perfect fit I place a small sheet
of sandpaper between the body and the neck, hold the neck in tightly and
slowly withdraw the sandpaper. The result, with only a few strokes,
is a perfect fit.
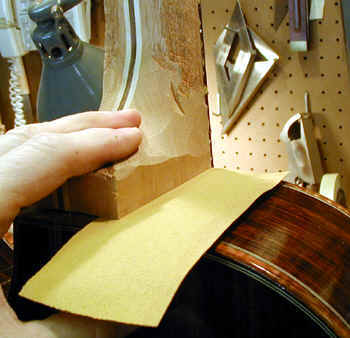 Another photo
of the same step. These days I do most of this "slip
fitting" before the neck is finished, and before all of the lacquer
is on the body. This is because the slip fitting sometimes leaves
small scratches in the finish, and this makes it easy to eliminate them.
Another photo
of the same step. These days I do most of this "slip
fitting" before the neck is finished, and before all of the lacquer
is on the body. This is because the slip fitting sometimes leaves
small scratches in the finish, and this makes it easy to eliminate them.
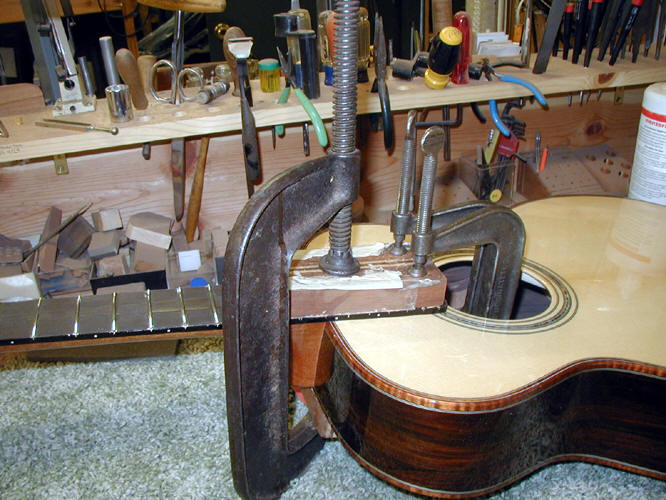 Gluing in the neck. the big C clamp I have used on virtually every
guitar I have made.
Gluing in the neck. the big C clamp I have used on virtually every
guitar I have made.
This website and all of its content, text and images are copyright ©1997-2011 by Charles A. Hoffman. All rights reserved.