In the "About Us" section of this site, I mention that I am a bit of a tool nut. Fact is, if I were to win the lottery, I probably would spend most of it on tools (and wood). In addition to buying tools, I have a fascination with building jigs and tools. Most guitar makers share this love -- much of what we do cannot be done with off the shelf tools, and so we make them. The fun thing about it is that there are as many ways to build a tool for a given job as there are toolmakers, and most of them will work. What I hope to do here is share some of the tools I love -- both the ones I bought and the ones I built. To get another view of this, I highly recommend Frank Ford's site. He too is obviously a tool nut, and has a huge site with dozens and dozens of cool ideas. I should also mention Jim Olson --Jim and I have shared ideas for tools for many years. He is without a doubt the most creative and compulsive tool maker I have ever known, and I have stolen 5 ideas from him for every idea he got from me. For some photos of his shop and tooling, go HERE.
 This
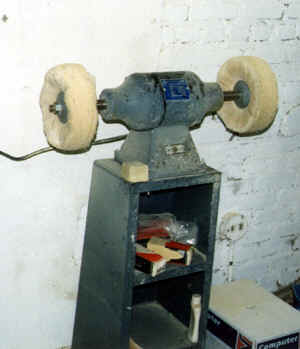
buffer pretty much saved my life -- at least my life
as a guitar maker. Before I got it, I polished with a hand held
auto polisher and (a lot) by hand. After a good many years of this
my right shoulder gave out -- causing me excruciating pain. I had
cortisone shots, which helped, but only for a while. So, I bought
a Baldor buffing machine. Baldor is one of the premium industrial
grade tool companies, and this has worked absolutely perfectly for at
least 15 years. I use it with bar type polishing compounds (which
I buy from Stewart MacDonald), and
I can completely polish a guitar in 30 minutes or less, with virtually
no physical effort. The tool does all the work, and does it perfectly.
If that isn't the definition of a good tool, I don't know what is.
This
buffer pretty much saved my life -- at least my life
as a guitar maker. Before I got it, I polished with a hand held
auto polisher and (a lot) by hand. After a good many years of this
my right shoulder gave out -- causing me excruciating pain. I had
cortisone shots, which helped, but only for a while. So, I bought
a Baldor buffing machine. Baldor is one of the premium industrial
grade tool companies, and this has worked absolutely perfectly for at
least 15 years. I use it with bar type polishing compounds (which
I buy from Stewart MacDonald), and
I can completely polish a guitar in 30 minutes or less, with virtually
no physical effort. The tool does all the work, and does it perfectly.
If that isn't the definition of a good tool, I don't know what is.
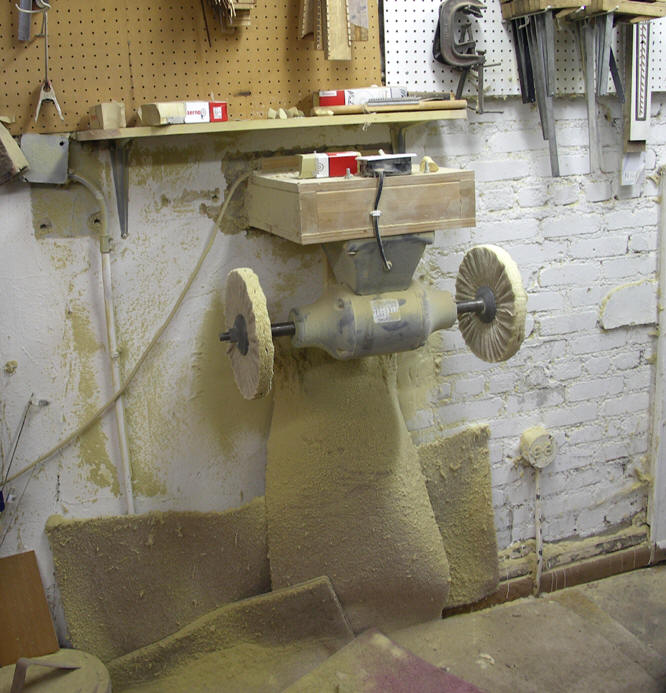 I recently
remounted my buffer. this gives me more room to maneuver the
instrument while I am buffing it. It is important to recall that all
buffing is done on the front lower quadrant of the wheel. If you
work above the centerline of the wheel it is very likely to grab the
guitar and throw it across the room - not good.
I recently
remounted my buffer. this gives me more room to maneuver the
instrument while I am buffing it. It is important to recall that all
buffing is done on the front lower quadrant of the wheel. If you
work above the centerline of the wheel it is very likely to grab the
guitar and throw it across the room - not good.
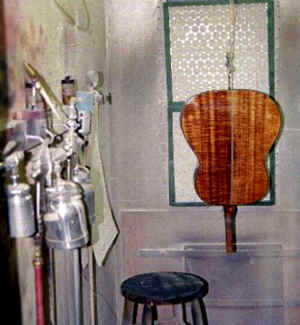 For
anyone building more than one or two guitars, or running a sizable repair
shop, a spray booth is an absolute necessity.
We have a 5 hp air compressor in the basement with air lines running to
the spray booth. (We also have a air outlet, and an air gun at each
work bench -- they are very helpful for cleaning). I have two standard
Binks spray guns (One for lacquer and one for sealer), a DeVilbiss touch-up
gun and an air brush. I have recently added a HVLP air gun
and a better air brush. The fan behind the filters is an all-aluminum
spray booth fan with the motor out of the air stream, which makes it absolutely
explosion proof. (While this booth is "homemade", it has
passed inspection by the fire inspectors, which surprised me a lot). This
fan has worked well for probably 22 years -- the only maintenance is replacing
the capacitor on the motor about every 5 years.
For
anyone building more than one or two guitars, or running a sizable repair
shop, a spray booth is an absolute necessity.
We have a 5 hp air compressor in the basement with air lines running to
the spray booth. (We also have a air outlet, and an air gun at each
work bench -- they are very helpful for cleaning). I have two standard
Binks spray guns (One for lacquer and one for sealer), a DeVilbiss touch-up
gun and an air brush. I have recently added a HVLP air gun
and a better air brush. The fan behind the filters is an all-aluminum
spray booth fan with the motor out of the air stream, which makes it absolutely
explosion proof. (While this booth is "homemade", it has
passed inspection by the fire inspectors, which surprised me a lot). This
fan has worked well for probably 22 years -- the only maintenance is replacing
the capacitor on the motor about every 5 years.
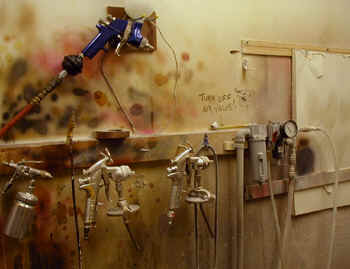 another photo of
the equipment in the spray booth. The blue gun is an HVLP (high
volume, low pressure) gun. They use about 40% less lacquer and this
both saves money and is good for the environment. I find that the
traditional guns give a better surface so I use them for the last coat of
lacquer. The set up includes an air hose for a blow gun as well as
one for the spray guns. The canister is a filter for the air.
Off to the right of the photo you see a pad of newsprint attached to the
wall. We use this to test the guns for spray pattern, color and the
like. After a sheet is covered we can tear it off and have a clean
one.
another photo of
the equipment in the spray booth. The blue gun is an HVLP (high
volume, low pressure) gun. They use about 40% less lacquer and this
both saves money and is good for the environment. I find that the
traditional guns give a better surface so I use them for the last coat of
lacquer. The set up includes an air hose for a blow gun as well as
one for the spray guns. The canister is a filter for the air.
Off to the right of the photo you see a pad of newsprint attached to the
wall. We use this to test the guns for spray pattern, color and the
like. After a sheet is covered we can tear it off and have a clean
one.
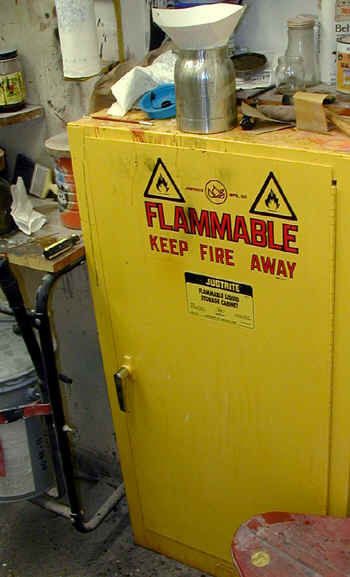 I have a metal
cabinet in the spray booth to store flammable materials. A very good
thing. At the bottom right corner of the photo you can see an
enclosed fireproof waste basket. Also a good thing.
I have a metal
cabinet in the spray booth to store flammable materials. A very good
thing. At the bottom right corner of the photo you can see an
enclosed fireproof waste basket. Also a good thing.
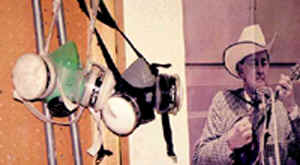 Just
a reminder -- an absolute necessity for spraying lacquers or any other
finish which has volatile compounds (shellac, varnish, lacquer, etc) is
a proper mask rated for organic vapors.
These are kept by the door to the spray booth. The photo of Bill
Monroe has graced the door to the spray booth for probably 20 years.
Just
a reminder -- an absolute necessity for spraying lacquers or any other
finish which has volatile compounds (shellac, varnish, lacquer, etc) is
a proper mask rated for organic vapors.
These are kept by the door to the spray booth. The photo of Bill
Monroe has graced the door to the spray booth for probably 20 years.
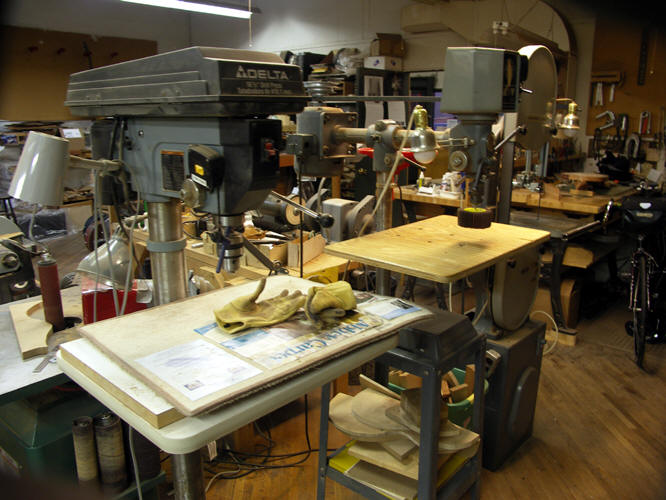
. This
is the main power tool center for our day to day work. Nothing very
unusual -- A Delta bandsaw (with riser block), two drill presses (a Delta radial drill press
and a more standard 16" drill press), a small buffer for polishing metal and bone,
a standard 6" grinder and a Tormek wet stone tool sharpening grinder. This grouping of
tools is located in the center of our main work room so as to be easily
accessible to all. Not shown is the dust-collector which is located
in the basement and the dust collector hanging from the ceiling right
above all of these tools.
This
is the main power tool center for our day to day work. Nothing very
unusual -- A Delta bandsaw (with riser block), two drill presses (a Delta radial drill press
and a more standard 16" drill press), a small buffer for polishing metal and bone,
a standard 6" grinder and a Tormek wet stone tool sharpening grinder. This grouping of
tools is located in the center of our main work room so as to be easily
accessible to all. Not shown is the dust-collector which is located
in the basement and the dust collector hanging from the ceiling right
above all of these tools.
 A different view of the two drill presses, the bandsaw and the spindle
sander.
A different view of the two drill presses, the bandsaw and the spindle
sander.
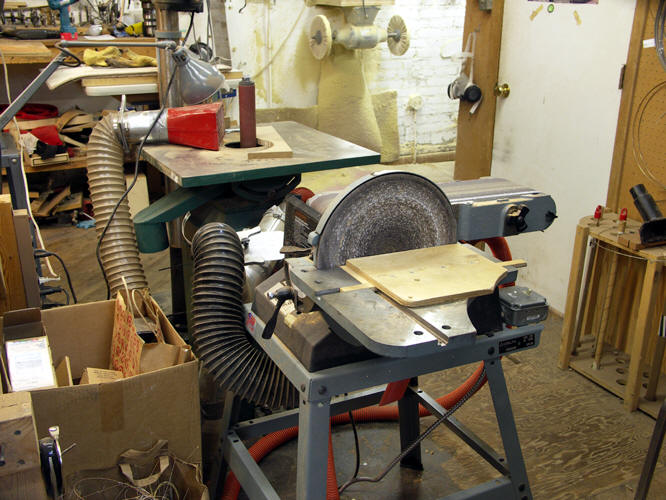 The belt - disc sander
is easily
the most used tool in the shop. We shape nuts and saddles, flatten
bridges, and shape all sorts of wood parts. I even use this tool
to do a large amount of the shaping of the necks on my guitars.
I can shape the complex curves of the heel and the Peghead volute rapidly
and to a fair degree of accuracy -- needing a minimal amount of file work
to refine the shape. The spindle sander in the background is
relatively new but has quickly become indispensible - I do not know how we
got along without it.
The belt - disc sander
is easily
the most used tool in the shop. We shape nuts and saddles, flatten
bridges, and shape all sorts of wood parts. I even use this tool
to do a large amount of the shaping of the necks on my guitars.
I can shape the complex curves of the heel and the Peghead volute rapidly
and to a fair degree of accuracy -- needing a minimal amount of file work
to refine the shape. The spindle sander in the background is
relatively new but has quickly become indispensible - I do not know how we
got along without it.
 Another view of the spindle sander.
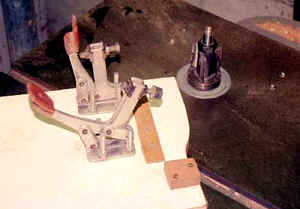 This
is one of my spindle shapers. ( I recently
got a second one, with a larger capacity, and I love it - photos soon).
It is quite a small unit from Delta, but has sufficed for 25 years.
Most of the work is done with this cutter--which is simply a straight
cutter with a ball bearing follower (rub collar) of exactly the same diameter.
I can then make jigs to create parts for the guitar which can be easily
duplicated. The jig on the table is for my bridge shape. You
will note that it only has one side. This means I have to flip the
wood and make two cuts to cut the profile, but it absolutely ensures that
the bridge will be symmetrical. I also shape the curvature for back
braces, cut the wedge I use in the butt end of my guitars, truss rod covers,
some rough shaping of top braces and shaping the heel of my necks.
I will talk about some of these ideas later on the tools
I made page. With different cutters, I cut the truss rod slot in
the neck and do some rough shaping of the neck.
This
is one of my spindle shapers. ( I recently
got a second one, with a larger capacity, and I love it - photos soon).
It is quite a small unit from Delta, but has sufficed for 25 years.
Most of the work is done with this cutter--which is simply a straight
cutter with a ball bearing follower (rub collar) of exactly the same diameter.
I can then make jigs to create parts for the guitar which can be easily
duplicated. The jig on the table is for my bridge shape. You
will note that it only has one side. This means I have to flip the
wood and make two cuts to cut the profile, but it absolutely ensures that
the bridge will be symmetrical. I also shape the curvature for back
braces, cut the wedge I use in the butt end of my guitars, truss rod covers,
some rough shaping of top braces and shaping the heel of my necks.
I will talk about some of these ideas later on the tools
I made page. With different cutters, I cut the truss rod slot in
the neck and do some rough shaping of the neck.
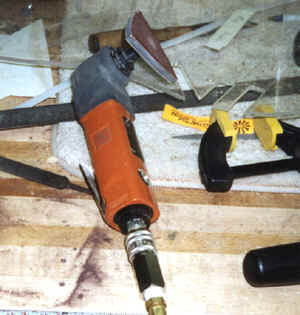 I just recently (June, 1999) bought this tool. It is an air
powered detail sander made by Fein. I love it. (Of course I love all tools
-- but this one more than most). I use it to shape
braces after they have been carved, finish sand the inside of the top
and back to remove any traces of glue squeeze-out, and a bunch of other
stuff. It really works well.
I just recently (June, 1999) bought this tool. It is an air
powered detail sander made by Fein. I love it. (Of course I love all tools
-- but this one more than most). I use it to shape
braces after they have been carved, finish sand the inside of the top
and back to remove any traces of glue squeeze-out, and a bunch of other
stuff. It really works well.
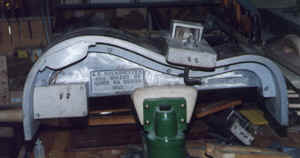 This
is the bending jig I use. It is
an old (perhaps 25 years) bending mold manufactured by A. E. Overholzer.
Art wrote a very interesting (and somewhat controversial) book on
classical guitar construction, and sold some very interesting tools as
well (I recall that he had been a machinist in his early years).
It is made of cast aluminum and has a heating element built in.
All I do is plug it in and let it heat for about 10-15 minutes, then clamp
the wood to the mold (photos to follow). I then turn it off and
allow the wood to cool naturally to room temperature. The wood comes
off fully bent and with little or no springback. I also have
one of these in a classic shape which I use for my concert shape guitar.
This
is the bending jig I use. It is
an old (perhaps 25 years) bending mold manufactured by A. E. Overholzer.
Art wrote a very interesting (and somewhat controversial) book on
classical guitar construction, and sold some very interesting tools as
well (I recall that he had been a machinist in his early years).
It is made of cast aluminum and has a heating element built in.
All I do is plug it in and let it heat for about 10-15 minutes, then clamp
the wood to the mold (photos to follow). I then turn it off and
allow the wood to cool naturally to room temperature. The wood comes
off fully bent and with little or no springback. I also have
one of these in a classic shape which I use for my concert shape guitar.
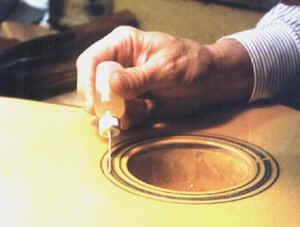 This is a tool which illustrates the fact that the simplest ideas
are often the best (credit Jim Olson for this idea.) One of the
essential tasks in finishing a guitar is filling the small voids and depressions
that are inevitable in making a guitar. Sometimes this is just
wood grain that was not fully filled, or a small void between the top
(back) and the binding, or as here, in the soundhole rosette (lacquer
will find the most infinitesimal cracks and will not bridge them).
these must be completely filled with lacquer before the final coats are
applied. For years I did this "drop filling" with
a brush and a jar of lacquer which I had allowed to get a little bit thick.
This little bottle, which has a very fine metal needle tip, is
sold by many woodworking catalogs and shops for glue application.
However, it is very good at this "drop filling" task.
The amount of lacquer is very easily controlled, both in volume and placement.
It is a substantial improvement in a job which is "minor" but
which has a great impact on the final appearance of the instrument.
This is a tool which illustrates the fact that the simplest ideas
are often the best (credit Jim Olson for this idea.) One of the
essential tasks in finishing a guitar is filling the small voids and depressions
that are inevitable in making a guitar. Sometimes this is just
wood grain that was not fully filled, or a small void between the top
(back) and the binding, or as here, in the soundhole rosette (lacquer
will find the most infinitesimal cracks and will not bridge them).
these must be completely filled with lacquer before the final coats are
applied. For years I did this "drop filling" with
a brush and a jar of lacquer which I had allowed to get a little bit thick.
This little bottle, which has a very fine metal needle tip, is
sold by many woodworking catalogs and shops for glue application.
However, it is very good at this "drop filling" task.
The amount of lacquer is very easily controlled, both in volume and placement.
It is a substantial improvement in a job which is "minor" but
which has a great impact on the final appearance of the instrument.
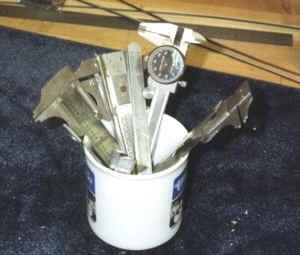 Measuring tools by the dozen!! I like to have lots of 6"
rulers around since I am using them constantly and frequently mislay them.
There is also a very nice simple metal calipers (Made by General) which
measures to 1/32 and I use a lot. We also have several dial calipers
and a digital caliper (I don't like the dial or digital calipers made
of plastic - even if it is high grade plastic. I feel they are simply
not accurate.) In the background of the photo is part of a Starrett
24" Rule which I love and use a lot.
Measuring tools by the dozen!! I like to have lots of 6"
rulers around since I am using them constantly and frequently mislay them.
There is also a very nice simple metal calipers (Made by General) which
measures to 1/32 and I use a lot. We also have several dial calipers
and a digital caliper (I don't like the dial or digital calipers made
of plastic - even if it is high grade plastic. I feel they are simply
not accurate.) In the background of the photo is part of a Starrett
24" Rule which I love and use a lot.
 The sandpaper rolls over our sanding station.
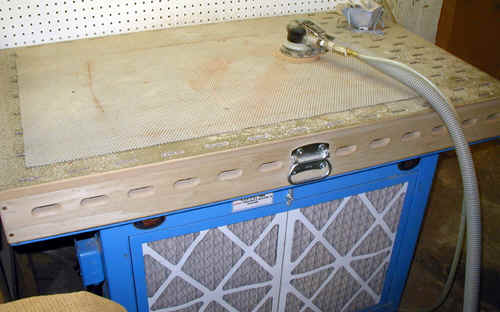 This is our downdraft sanding table. I think this will add years to
my life and it makes sanding much easier and pleasurable (if sanding can
be pleasurable). Expensive but worth every penny.
This is our downdraft sanding table. I think this will add years to
my life and it makes sanding much easier and pleasurable (if sanding can
be pleasurable). Expensive but worth every penny.
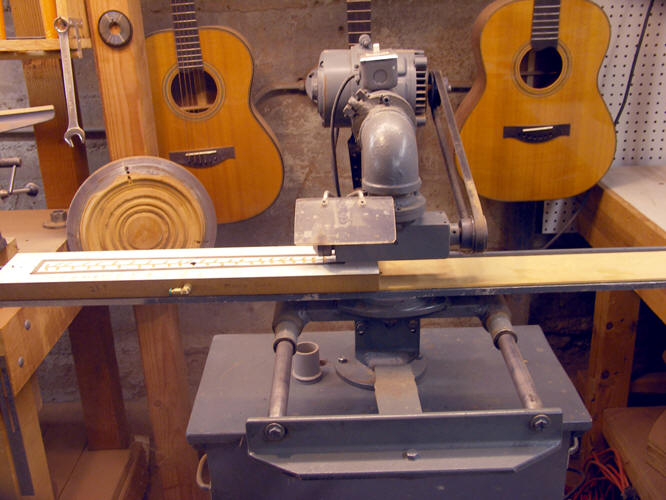 My fret slotting saw. The table slides under the saw blade and the
fingerboard is held on a fixture that slides along the table and is indexed
at the appropriate spots. Each scale length I use has its own fixture.
My fret slotting saw. The table slides under the saw blade and the
fingerboard is held on a fixture that slides along the table and is indexed
at the appropriate spots. Each scale length I use has its own fixture.
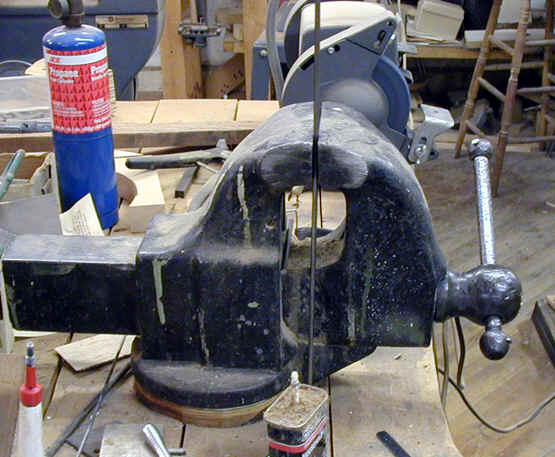 This vice has been in my family for many years. I remember it in my
paternal grandparents home when I was perhaps 8, and it was old
then. It works very well and is very heavy.
This vice has been in my family for many years. I remember it in my
paternal grandparents home when I was perhaps 8, and it was old
then. It works very well and is very heavy.
 I recently got an oscillating spindle sander - the spindle goes up and
down as well as around. It is a wonderful tool - makes many sanding
jobs much easier. It came with 9 spindles of different sizes and
they are easy to change.
I recently got an oscillating spindle sander - the spindle goes up and
down as well as around. It is a wonderful tool - makes many sanding
jobs much easier. It came with 9 spindles of different sizes and
they are easy to change.
 Michele
recently glued the back onto an old Dyer Brothers Harp Guitar (with a little
help from me) and it took 32 clamps. Proof of the old adage - you can
never be too rich, too thin or have too many clamps.
Michele
recently glued the back onto an old Dyer Brothers Harp Guitar (with a little
help from me) and it took 32 clamps. Proof of the old adage - you can
never be too rich, too thin or have too many clamps.
 A year or so ago I bought this General double Drum Sander. I must say
that it is a wonderful tool (not perfect but very good) and that I am
continuously thinking of new things to use it for. Not cheap,
but worth it. Of course I still wish I could afford a wide belt
sander, but that's pretty much la la land. The Powermatic double Drum
Sander is a bit bigger and if I were doing it all over I might have bought
that one. But it was also about $1000 more money.
A year or so ago I bought this General double Drum Sander. I must say
that it is a wonderful tool (not perfect but very good) and that I am
continuously thinking of new things to use it for. Not cheap,
but worth it. Of course I still wish I could afford a wide belt
sander, but that's pretty much la la land. The Powermatic double Drum
Sander is a bit bigger and if I were doing it all over I might have bought
that one. But it was also about $1000 more money.
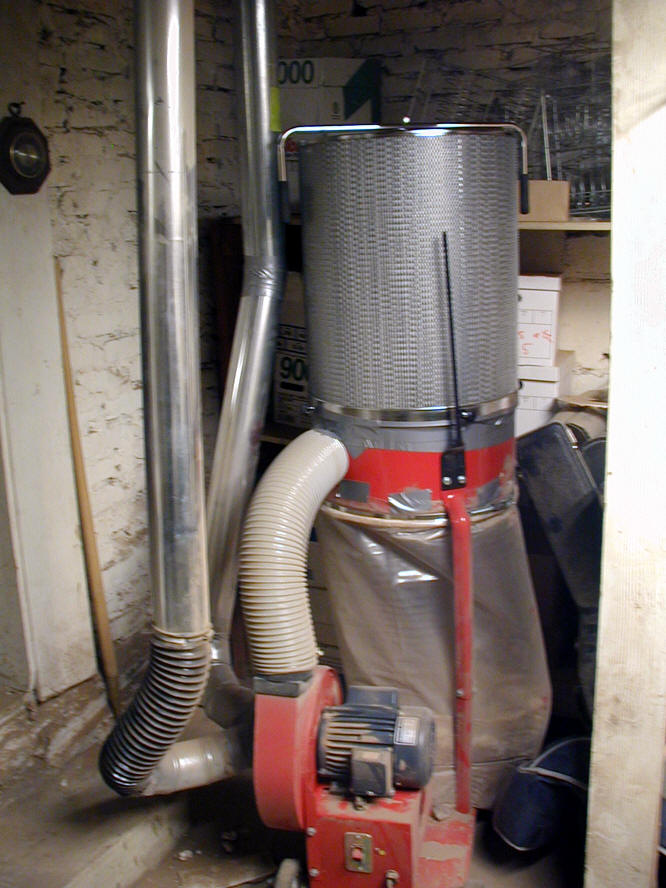 You gotta have a dust collector. My aspiration is to a bigger cyclone
dust collector, but not yet.
You gotta have a dust collector. My aspiration is to a bigger cyclone
dust collector, but not yet.
 The cash register I have had since we opened in 1971 - and I imagine that it
is at least 100 years old. Perhaps not a tool, but it is cool.
We use it as a cash drawer, and the computer next to it is our real
accounting system. That is a tool we use constantly - but not as cool
as the cash register.
The cash register I have had since we opened in 1971 - and I imagine that it
is at least 100 years old. Perhaps not a tool, but it is cool.
We use it as a cash drawer, and the computer next to it is our real
accounting system. That is a tool we use constantly - but not as cool
as the cash register.
 A guitar store has to have music, right?? So here are the CDs and the
player.
A guitar store has to have music, right?? So here are the CDs and the
player.
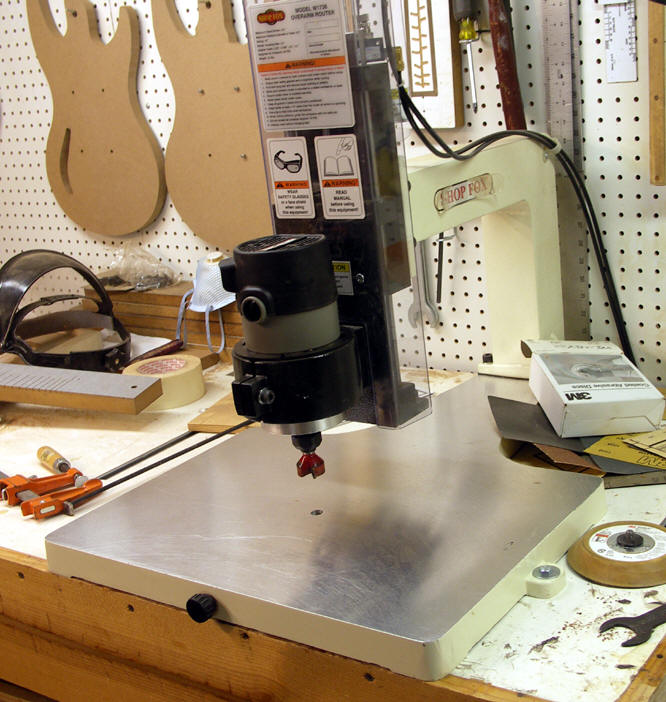 We recently got an over-arm router. It has a pneumatic device which
lowers the router into the work. Quite useful for solid bodies - I am
not sure how I will be using it for my acoustics.
We recently got an over-arm router. It has a pneumatic device which
lowers the router into the work. Quite useful for solid bodies - I am
not sure how I will be using it for my acoustics.
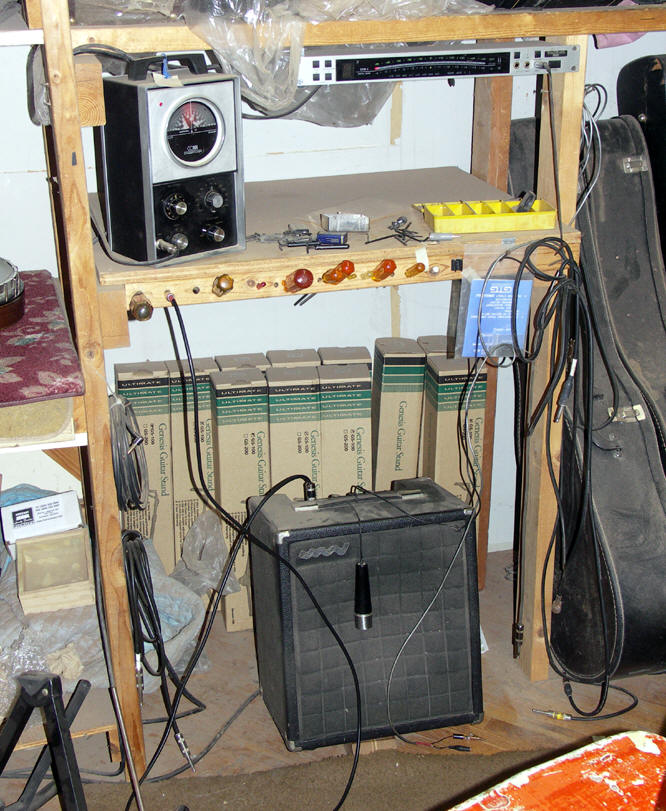 A small strobe tuner and an amp - invaluable for repairs generally and on
electrics particularly.
A small strobe tuner and an amp - invaluable for repairs generally and on
electrics particularly.
This website and all of its content, text and images are copyright ©1997-2011 by Charles A. Hoffman. All rights reserved.